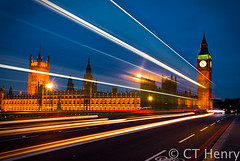
So many people think that photography is effortless. They expect to pick up a camera and take great photos in a week, but the thing that separates the professionals from the amateurs is consistency. Watch Bob Jones’ interview for quality advice on how to capture great images.
10 WAYS TO GET TACK SHARP PHOTOS
16 AugOne of the biggest frustrations for beginning photographers is blurry images. You open your picture on the computer or print the photo only to discover that the main subject is out-of-focus. In fact, it happens so much that novices think that an unfocused image is quite acceptable.
Getting the subject in focus is one of the most important concerns to pro photographers. You may hear some refer to certain images as “tack sharp”. This involves more than merely glancing at the LCD screen on the back of the camera. The picture may look in focus on the small 3” screen, but only by zooming in to 100% can you really check the sharpness of the image.
Most of the time, blurry images are simply due to the vibrations caused by our hands, otherwise known as “camera shake”. Nevertheless, photographers can take steps to ensure that their images are tack sharp.
10. Buy a VR or IS lens
Most new kit lenses come with vibration reduction (VR) or image  stabilization (IS) technology, which compensates for camera shake while hand-holding the camera. Although its effects may be slight, it could mean the difference between a blurry photo and a focused one. Nevertheless, this technology isn’t going to help you get a perfectly sharp shot in really low lighting conditions.
9. Use TWO hands and keep the elbows close together
Have you seen tourists holding their cameras out with one hand to take a photo? It’s a good bet that their image will be out-of-focus. Two hands are always better than one to help stabilize the camera and minimize camera shake. If you have a DSLR, place one hand under the lens to support it, and use the other hand for the shutter button. Keep your elbows close together. This creates a stable platform, which reduces camera shake.
8. Hold the camera closer to you
Your hands shake more when you hold a heavy object farther away from your body. Hold your digital camera near your face to reduce the vibrations caused by your hands. If you have an eye-piece on the camera body, use it to get closer to the camera.
When you press the shutter halfway down, the light meter calculates a shutter speed and an aperture value according to the available light in the scene. Looking through the viewfinder, the number on the far left is the shutter speed (for Nikons anyway). If it reads: “50,” it really means 1/50 of a second. While hand-holding the camera, you want to take the picture at a shutter speed at or faster than 1/60. Faster shutter speeds compensate for any vibrations from your hands. Most of the time, the 1/60 rule is a great guideline, but it won’t help you in all shooting conditions. For instance, your shutter speed needs to be higher than 1/60, if your subject is moving. Nevertheless, it’s always a good idea to check your shutter speed before you take a photo. If it falls lower than 1/60 when hand-holding the camera, you can expect blurry results.
6. Increase your ISO
If your shutter speed is slower than 1/60, try increasing your ISO. ISO involves the camera’s sensitivity to light and “bumping up” the ISO allows you to take photos at faster shutter speeds that compensate for camera shake. Nonetheless, this technique has a cost. It’s great that you can achieve high shutter speeds in low light, but you sacrifice image quality. The more you increase your ISO, the grainier your images will look. These grainy, unwanted pixels are called “noise.” It’s a trade-off. If you want to get the image in focus, you might have to sacrifice quality. With today’s’ digital cameras, you can increase the ISO to 800 without much noise.
5. Shoot in Continuous Burst Mode
Ever see sports photographers hold their finger on the shutter and take a lot of photos all at once? That’s a continuous burst! The longer you hold the shutter button down, the more photos the camera takes. Some cameras can shoot up to 9 frames per second in this mode. And with this many images being created so quickly, one of them is bound to be in focus. No matter what my subject is, I usually take 2-3 photos in continuous bust mode.
4. Use the Self-Timer
Sometimes you can introduce vibrations simply by clicking the shutter button. Another way to avoid camera shake is to use the self-timer function on your digital camera. M ost self-timers are programmed for 2 or 10 seconds. After placing the camera on a flat surface and turning on the self-timer, click the shutter to start the timer and then take your hands completely off the camera. After the set amount of time, you’ll hear the camera create the image. Since you aren’t touching the camera, there is no camera shake. You get a sharp picture every time!
3. Use a Tripod
There is nothing more stable than a trip od, and pro photographers, who are obsessed with getting tack sharp images, use tripods all the time to avoid camera shake. They also use a self-timer, remote trigger, or a cable release to take the exposure instead of pressing the camera’s shutter button. If you want a tack sharp photo, use a tripod as much as possible. I love mine!
2. Use the Single Point AF Method
Did you know you can tell the camera exactly what you want in focus? When you press the shutter button halfway down, you’ll see a box or point light up in your viewfinder. Whatever is in that box will be in focus. First, make sure you set your AF (Auto Focus) area to “Single” rather than “Wide” or “Dynamic”. Then use the joystick or multi-selector button on the back of the camera to move the point or box around. Remember: you must engage the AF by pressing the shutter halfway down first. With the multi-selector button, you can now choose what will be in focus!
1. Zoom In to Check Sharpness
After you take a photo, review it in playback mode on the LCD screen and zoom in to check the sharpness. (There’s usually a magnification button on the back of the camera.) If the picture is blurry, you can immediately shoot again. If you forget, the opportunity to retake the picture is gone.  Get into the habit of checking your sharpness after every shot. This takes persistence, but it will save you from being disappointed later on when you view the images on your computer screen.
Follow Me On Facebook!
12 Aug I just started a Facebook Photography page, where I’ll post my best images and dispense free photography tips and advice. If you’re interested, please go to: www.facebook.com/cthenryphoto OR just search for “C.T. Henry Photography” on Facebook. To follow my posts in the future, please click “Like” button at the top of the page.
Feel free to comment and discuss the images I post.
I also have a new portfolio at: henryct.500px.com. The interface is much better than Flickr, and the pictures look gorgeous! Stop by and see my latest most recent work.
Thanks!
10 Tips For Your Next Photo Trip
8 MarPlanning to take photos on vacation or a business trip? Here’s a checklist of ten items that might help you on your next photo excursion.
When planning a shoot, it’s important to research and prepare your gear.
RESEARCH –
1. Check the weather forecast.  The forecast will tell you two things: what clothes to take and what kind of light to expect. On a recent trip to New Mexico, I knew it was going to be cold, so I purchased a pair of REI convertible mittens that allow me to use my fingers when shooting. The predicted skies also allow me to plan for different types of light. If it’s very sunny, I’ll avoid the mid-day hours when it’s too bright. The best conditions for photography are partly or mostly cloudy. On partly cloudy days, I’ll shoot landscapes, and on mostly cloudy days, I’ll look for details or take portraits because the light is diffuse and more flattering.
2. Find out the time and direction of sunrise and sunset.  Most travel photographers shoot during the “Golden Hours”: the half-hour before and after sunrise and sunset. The light at this time has a golden hue and is less harsh than at other times in the day. Warm hues are also more captivating to our eyes. I use various tools to let me know the time and direction of sunrise and sunset. This allows me to plan for how the light will fall on the land. I highly recommend downloading The Photographer’s Ephemeris App for your computer or iPhone. I don’t go anywhere without it.
3. Visit travel guide or visitor information sites. I always Google the location and read travel information about the area. First, it gives me an idea of what I can expect: the local culture, places of interest, and maybe special events or festivals that maybe happening while I’m there. Before I went to New Mexico, I found several driving tours on a travel site, and they were definitely the best part of the trip. Second, I’m able to make an itinerary and prioritize the areas that I’d like to see the most.
4. Look at photos of the area. Go to Flickr and Google and browse for images of the area. This usually gives me a sense of what the area looks like, and I specifically look for interesting subjects to shoot. Although Flickr is a good place to start, I find the most helpful part of the planning stage is visiting local photographer’s websites. Their portfolios give me a better idea of what’s actually possible than some of the more amateur photos on Flickr.
5. Print out maps of the region –  Another helpful aid is a topographical map, especially for shooting landscapes. I usually print out a topographical map from Google maps. On my trip to New Mexico, the map helped me understand the terrain, which consisted of several mountain peaks. I was able to see where the mountains were in relation to setting sun. I also print out maps of the area for driving purposes.
6. Make shot list. After all this research, I jot down a few ideas of photos that I’d like to take in my notebook. For instance, I wanted to take a photo of the mountains with the moon in the background. I also wrote down: vivid colors of the Southwest, old people, young people, religion, food, something odd or whacky, signs, skiers, a low-angle shot of old cars, night shots of the village and mountains, and bridges.
GEAR –
7. Charge batteries. If you have a DSLR camera, make sure to travel with fully charged batteries. If you use a point-and-shoot camera, make sure to take extra batteries with you. In cold weather, batteries loose their charge at a faster rate. I always take an extra battery and my charger with me on all trips.
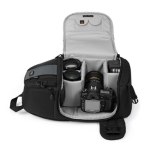
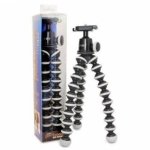
8. Pack your bag. 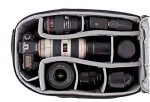 Once you’ve drawn up a shot list, you will need to decide what camera accessories to take. For landscapes, take a wide-angle lens. For shooting details and portraits, take a telephoto lens. I also include my cleaning kit as well as my trusty tripod. Some other accessories to consider are: a flashlight, compass, memory card case, speedlight, mini-tripod/gorillapod, and granola bars. (Yes, always take a snack. Trust me.)
9. Clean camera and lenses. Once the batteries are fully charged, you can safely clean the DSLR’s sensor. I also wiped down my camera body and clean my lenses. (I’ll write about how to do this properly in a future post.)
10. Reformat your memory cards. You should always have more than one memory card. Before you trip, make sure to reformat your memory cards, so when you’re finished shooting with one, you can easily slip in another one knowing that it’s already formatted. There’s nothing worse than putting in a new memory card and having to wait for it to format. It’s a sure-fire way of missing the shot.
Have a great trip!!!
3 Things to do with Your New Digital Camera
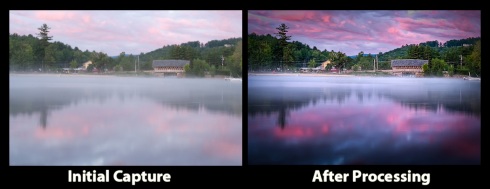
22 Feb1. Process your images. Don’t rely solely on the image that comes directly out of the camera. Photos that come right out of the camera usually look flat and unappealing. Ultimately, they fail to convey what the scene looked like when you took the picture. There are tons of software programs out there that will help you improve the sharpness, brightness, color, and overall tone of the photo: iPhoto, Photoshop Elements, Picasa, Aperture, Paint Shop Pro, Photoshop, Lightroom, and many more. While today’s digital photographers know that they can improve their images, many just aren’t willing to spend the time sitting in front of a computer. To take your photography to the next level, you must view the digital darkroom as part of the overall process to create powerful photographic images. Most people like the idea of becoming a photographer, but some don’t like the process. It’s hard work.
Once I show my students the difference between a shot right out of the camera and a processed image, they start to believe that the amount of time spent improving the photograph is totally worth it. If you love photographs, you’ll want to create the best possible image.
2. Print some of your best images. There’s nothing better to the ego than a nice big print of something that you shot. Treat yourself to an 8×10 or larger. If you don’t have your own printer, I recommend using Mpix.com. It’s quick and easy. Mpix’s slogan is “Shoot Today. Upload Tonight. We Ship Tomorrow.” Their prints are stunning! If you have a Mac, you can even use iPhoto and order custom prints. However, the quality just isn’t the same as Mpix. Whatever print store or online store you use, just get some prints. Having them in your hand will be worth it!
You can also learn a lot from a printed image. Sometimes the LCD screen on the back of the camera can fool you. After a few weeks of shooting, I ask my students to send me their two best images, and then I print them out. We have a critique session, and the students find areas that they can improve. Mostly they find that the object that they meant to be in focus, isn’t in focus at all. Others see how they could’ve composed the scene more appropriately. To become a better photographer, learn from your printed photos.
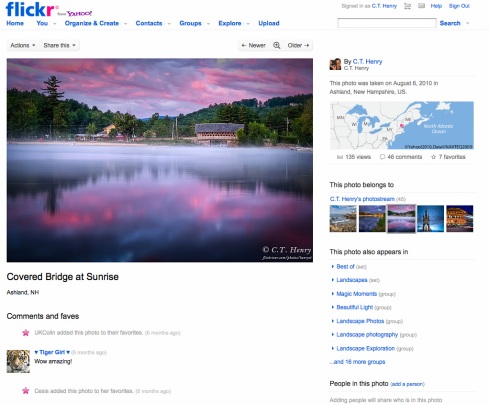
3. Share your images. DON’T live in a creative vacuum; join a photo-sharing community. It’s essential to see what other photographers are doing creatively and receive feedback on your images. You can even join groups who own the same camera that you do. Two of the most popular ways to share your photos is to post them to Flickr or Facebook.
Flickr is the ultimate photo-sharing site for beginners and intermediates, where you can get immediate feedback from other photographers. After you upload some pictures, join Flickr groups that you might interest you. If you want instant recognition, become a member of award groups like Flicker’s Got Talent. Here you post your image, give five other members an award, and then sit back and wait for the members to shower you with awards. You can even post your best images to a group called National Geographic: Are You Good Enough? If you want more critical feedback, join groups like Life Thru A Lenz or Truly Constructive Criticism. If you like landscapes, join a landscape group. If you like portraits, join a portrait group. From time to time, it’s also fun to meet with a group of photographers in your area. You can even sign up with a Flickr Meetup group. When I lived in London, I was a member of the London Flickr Meetups group that went on a night photography shoot together. The possibilities and the fun are endless.
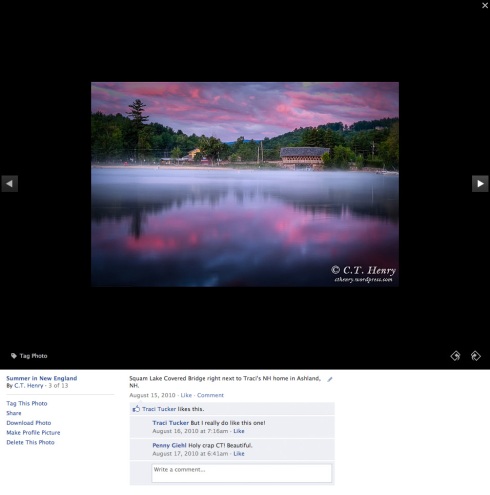
Facebook is another great place to share your photos. By simply posting your photo, friends can comment or click the “Like” button. There’s nothing better than having your friends tell you how much they love your images.
Whatever you do, don’t let your images simply exist on your camera’s memory card or sit idle on your hard drive. You have to let your photos go out into the world.
Next Post: 10 Tips for your next Photo Trip
Great Advice for All Photographers
16 Feb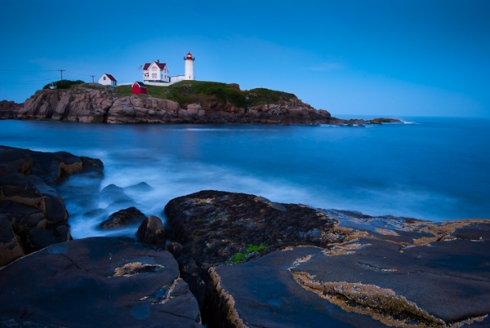 In my last post, I mentioned how Ansel Adam’s powerful quote, “You don’t take a photograph, you make it,” becomes the guiding principle and foundation of the course. In the next lesson, we look at quotes by other photographers and ask how we can incorporate their lessons into our own photography. I’m going to ask you to do the same. After reading each quote, ask yourself:
1. What does the quote mean to you?
2. How will this advice improve your photography?
“Get a Notebook. No photographer should be without one!” – Ansel Adams
All of my students are required to carry a notebook in their camera bag. It’s a place for technical notes and shot lists, but it’s also easily accessible when you’re out in the field shooting and you forget how to do something.
“Take your dang camera with you everywhere! Cartier-Bresson took his camera with him everywhere—to the cleaners, to the cafe, to the cinema…he always had his trusty Leica M2 with him.” – Chris Orwig
I can’t stress this enough: It takes practice to be good at anything. You’ve got to do your visual push-ups everyday. The best way to do this is take your camera with you wherever you go.
“Your first 10,000 photographs are your worst. – Henri Cartier-Bresson
Don’t think that you can become a great photographer in one day or in a year. You’ve got to put in the time. You’ve got to spend a lot of time looking. You’ve got to click the shutter and learn from your mistakes. Ansel Adams is also famous for saying, “Twelve significant photographs in any one year is a good crop”. And he’s a professional!
“Become a more interesting person” – Jay Maisel responding to a student who asked him how to create more interesting photographs.
I can’t resist adding another quote of Jay’s since he’s the Yoda of photography quotes: “You have to want to look before you can see. There are a lot of people who think that the world and their life are boring. They don’t want to look. They’re negative outlook is what they bring to the world. Life is a bore. They don’t what to see possibilities; they’re not open to the world around them. They don’t see colors or gestures. You’ve got to want to look before you can see. It’s what you bring to it.” Essentially, living an enriched life makes you see the world rather than just look at it.
“Still of hand does not make up for emptiness of heart” – Rodney Smith
“The camera for an artist is just another tool. It is no more mechanical than a violin if you analyze it. Beyond the rudiments, it is up to the artist to create art, not the camera.” – Brett Weston
You can know all the camera techniques by heart and still miss the decisive moment. While you may be able to hand-hold a camera at 1/15 of a second and get the shot in perfect focus, it doesn’t mean that your image will touch people’s lives.
“I always thought good photos were like good jokes. If you have to explain it, it just isn’t that good.” – Syl Arena
Your photos should speak for themselves. If you find yourself explaining them, you need to work harder to tell the story visually.
“Photography is essentially an art of exclusion…It’s not always what you put in your frame – it’s sometimes what you leave out.” – David duChemin
The best images look effortless. Just like a poet says so much in so little words, aim to reduce the concept to its essence by ruthlessly excluding all the elements that don’t add to the story.
“The difference between great photographers and a not so great photographers is that the great ones don’t show their crappy pictures.” – Rick Sammon
Edit fiercely. Many of my photos end up in the trash. I’m only interested in the keepers.
“Which of my photographs is my favorite? The one I’m going to take tomorrow.” – Imogen Cunningham
Never be truly satisfied. Always have room for more photos and improvement.
Next Post: Three Things You Should Do with Your New Digital Camera
Make Pictures, Don’t Just Take Pictures
15 FebIn one of my first lessons, students discuss how they usually take pictures and what they expect to learn from the class. Most of their experience with cameras has been to see something, point their camera at it, and shoot it. This point-and-shoot technique results in snapshots, or photos that are taken without much thought. Anyone can do it. It’s easy. Most of the time, they shoot in Auto mode, so the camera actually decides how the image looks in the end.
Often the picture is of sentimental value. It’s a moment that the picture taker wants to remember. So it’s not how the photo looks; it’s all about how the person, who took the picture, feels. By itself, the photo doesn’t convey anything special. Meaning is only given to the image by the sentimentalist. In other words, the picture, shown to someone else, wouldn’t express the same nostalgia. Furthermore, no consideration is given to distracting elements in the background (like the pole coming out of my head in the picture above), what is in focus, or the camera angle. It’s simply a snapshot.
Students learn that to improve their photography, they must be able to communicate visually. After several weeks of lessons, the students freely quote Ansel Adam’s mantra: “You don’t take a photograph, you make it.” The feeling that you want to express or remember is actually a part of the image and directly accessible to other viewers. Transforming the scene into a storytelling device is the major aim.
Once you decide to abandon the point-and-shoot approach, you start with a willful desire to create images. You begin to look at the world through the eyes of an artist. You understand that you have the ability to interpret the scene and manipulate it in a way to communicate your unique vision. And the first step to creating visually interesting images is to take control of the camera! If you’re going to interpret the scene, you’ve got to switch Auto mode off.
My students start their photographic trek on Program (P) mode, which is like Auto in some respects, but gives them greater control over the brightness and color of their 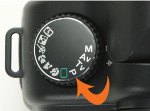 photos. Slowly but surely, they take control of the entire camera, working their way to Aperture Priority mode, then Shutter Speed Priority mode, and finally Manual mode. With each step, they take further control of the camera and realize how they can communicate their unique vision to the viewer. They see the world in a completely new way, and it results in visually interesting photos.
All great images start in the photographer’s mind. When you make a picture, you visualize exactly what the photo will look like in print before ever clicking the shutter. You think about all the elements in the scene and how they can complement each other. You think about the lighting, the background, and what elements should be included or excluded from the scene. Try to make these creative decisions BEFORE you shoot. Ask yourself:
1. What story am I telling?
2. What is the subject?
3. What is in the background and foreground?
4. What parts of the scene compete with or distract attention away from the subject? How can I cut the clutter?
5. Am I close enough to the main subject?
6. What is my main source of light? Where do I want the light in my image?
7. What areas do I want to be in focus? What do I want to be out of focus?
8. What perspective do I want to shoot from?
9. Should the shot be in the horizontal format (landscape) or vertical format (portrait)?
10. Do I want to create a sense of movement?
Anyone can take a picture, but it requires a skilled photographer to tell a story in one still image.
Homework: Create a shot list. Visually imagine pictures you’d like to create. Think about the scene as a movie director would. What does the scene need? Think about location, casting, props, lighting, etc.
Next Post: How to be Creative – Advice from the Masters
Don’t shoot it, if it doesn’t excite you
11 FebBased on my last post, hopefully you just bought or received a new digital camera as a gift. After you took it out of the box, I bet you just couldn’t wait to take pictures. Lots of pictures! Clicking the shutter button is completely irresistible! Most novices start shooting away with abandon.
While it doesn’t cost anything to click the shutter several hundred times, if you really want to improve your photography, avoid the temptation to shoot everything – whether it moves or not.
In the first lesson with my students, I teach them one simple rule: Don’t shoot it, if it doesn’t excite you. In other words, there should be a reason why you’re clicking the shutter button. In the lesson, we look at different types of photography. I show them a series of images: portraits, landscapes, wildlife, travel, sports, and night photos. In an effort to show them what’s possible, I select only the best professional photos. They marvel at the images, often exclaiming “Wow!” The goal of the lesson is for them to find their passion. I ask them: What images stir something inside them? Which photos make them jealous? (making them wish that they had taken the photo). At the end of the slideshow, I ask them to select two categories that truly excite them. Those are the types of photos that they should seek out and create.
My point is that your best images often include subjects that you’re most passionate about. Shoot what you love, and you’ll be surprised how that passion comes across in your photography. The novice, who tries to capture everything, usually ends up with nothing. They’re just snapshots that don’t say much. The first step to better photos is to find your passion and shoot it.
Next Post: From Snapshots to Great Shots
